

Federations
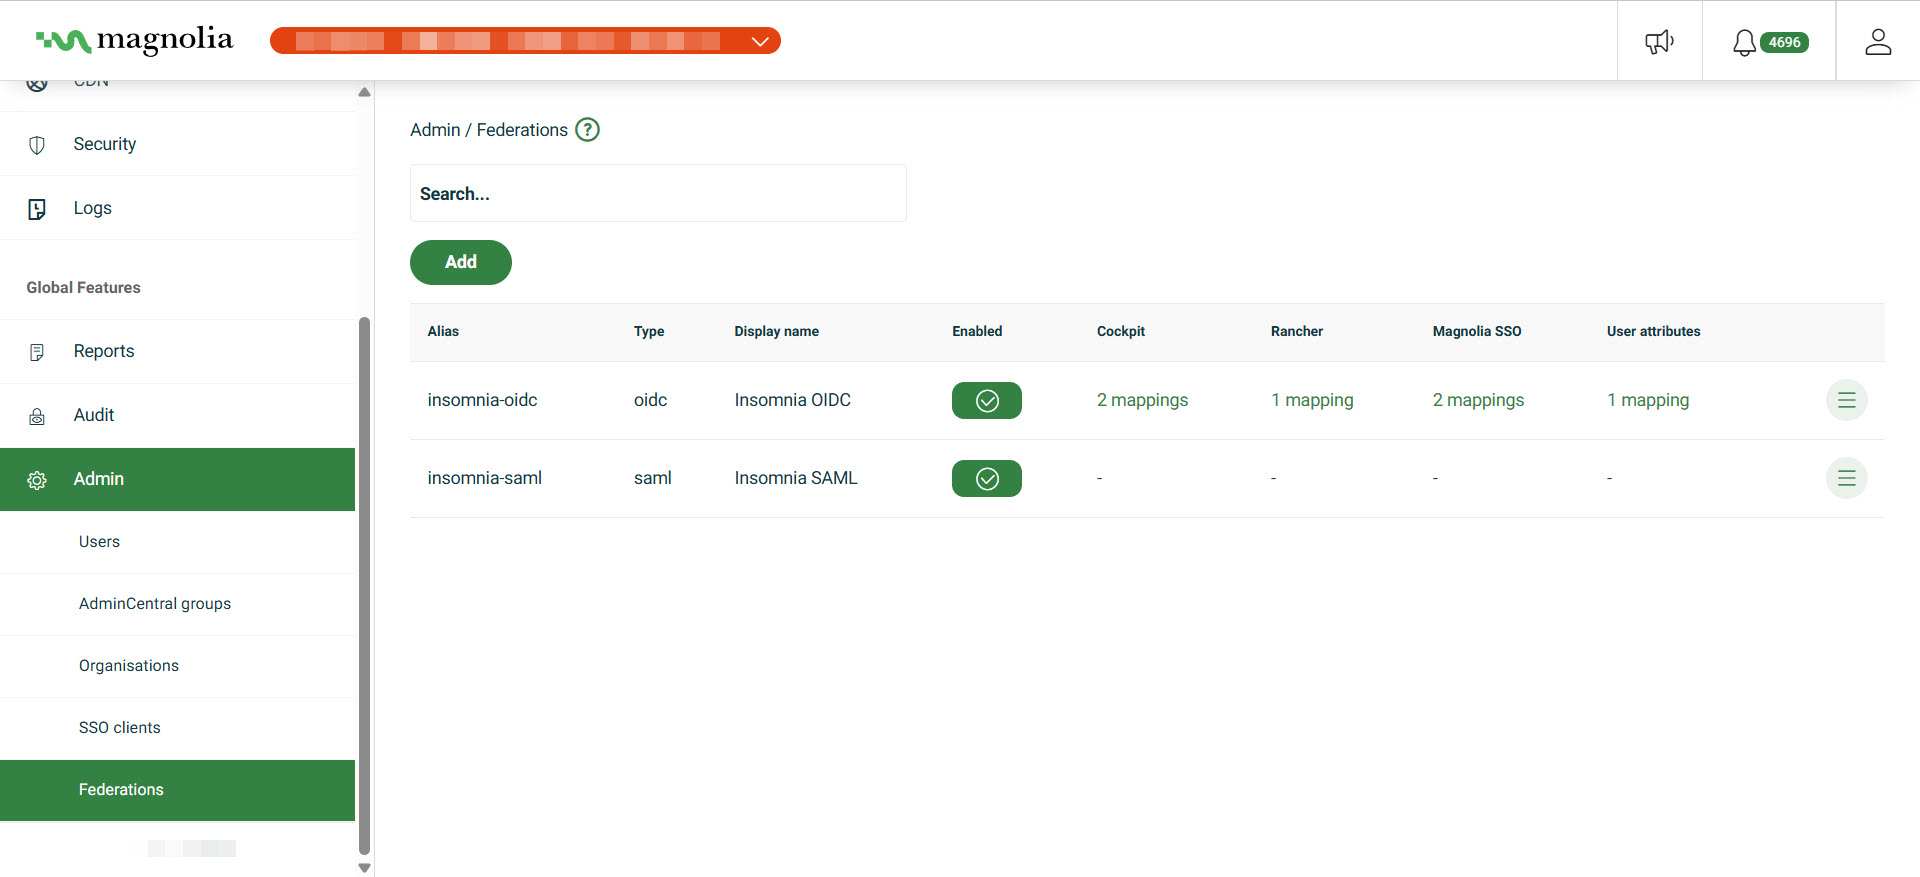
Federations enable your organization to integrate external Identity Providers (IdPs) with our DX Cloud platform through OpenID Connect (OIDC) protocols or SAML. In the DX Cloud Cockpit, you can configure Federations to establish trusted relationships with third-party identity systems, configure Cockpit and Rancher mappings, as well as define user attribute mappings between your external IdP and platform resources.
In this section:
You can also find embedded help and field descriptions directly in the Cockpit.
Add a Federation
-
In the Cockpit, go to Admin > Federations.
-
Enter a Display name for your Federation. This autofills the Alias field.
-
Check Enabled if you want to enable the Federation.
-
Select the Type of the Federation: OIDC or SAML.
OIDC settings
The following are required:
- Enter the Authorization URL.
- Enter the Token URL.
- Enter the Client ID.
- Enter the Client secret.
The remaining fields are optional but recommended:
- Enter the Logout URL.
- Enter the User info URL.
- Enter the Issuer.
- Check Validate signature if you want to validate the signature of the IdP token.
- Check Use JWKs URL if you want to use the JWKs URL to validate the signature of the IdP token.
- Enter the JWKs URL.
SAML settings
The following are required:
- Enter the SAML Metadata.
The remaining fields are optional but recommended:
- Enter the Name ID Policy Format.
- Enter the Principal Type.
Use
NameID.
-
Under Advanced settings, choose the Sync Mode:
- Force on every login
- Import only on first login
-
Check Trust Email if you want to trust the email of the user.
Edit a Federation
When you add a Federation, you connect DX Cloud to an external identity provider (IdP) to manage authentication for your users. This allows your organization to use Single Sign-On (SSO) through supported protocols like OpenID Connect (OIDC) or SAML.
After creating a Federation, you can add Cockpit, Rancher, Magnolia SSO, and User attribute mappings as required.
- In the Cockpit, go to Admin > Federations.
- Open the row menu and click Edit.
- Choose one of the following to edit:
Cockpit mappings
Cockpit mappings assign users to Cockpit groups based on IdP token claims.
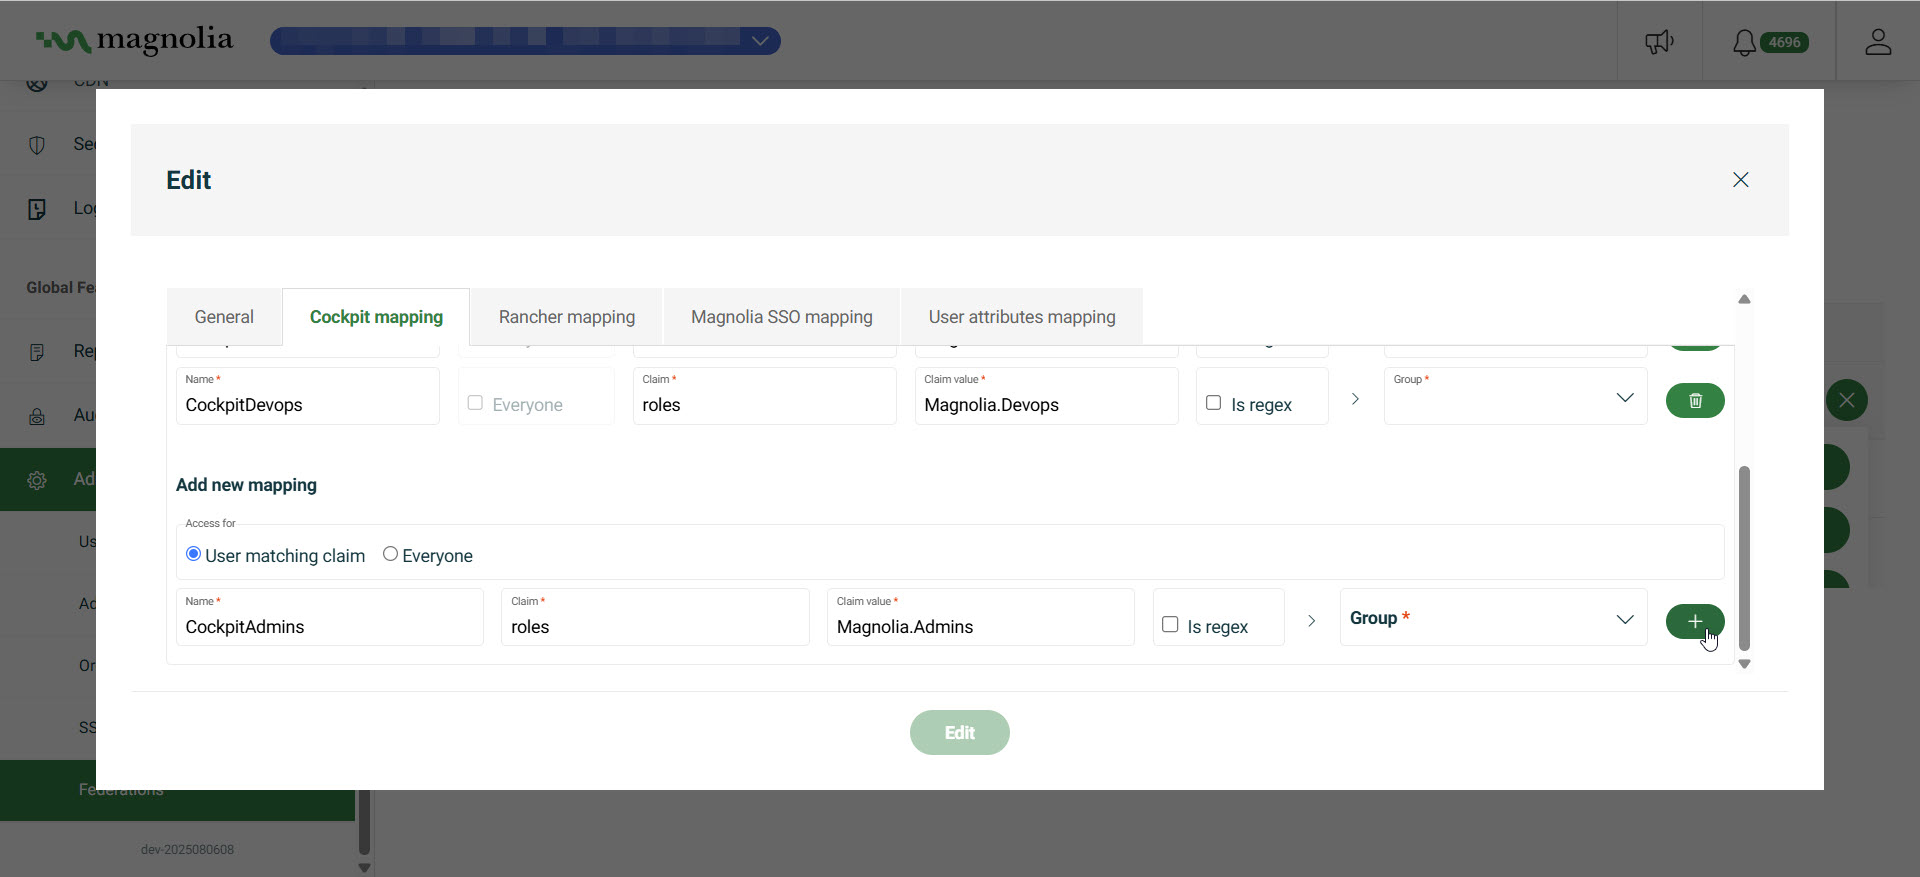
To create a Cockpit mapping:
-
Go to the Cockpit mapping tab.
-
Go to Add new mapping.
-
Under Access for, select one of the following:
- User matching claim: only users whose IdP token contains a matching claim are assigned to the group.
- Everyone: all federated users are assigned to the specified group, regardless of claims.
-
Enter a Name for the mapping (used internally to identify the mapping).
-
Enter a Claim (the attribute name in the IdP token, for example
email,groups,department, orroles). -
Enter a Claim value (the expected value to match).
-
Select whether it should be an exact match or a regex with Is regex. Leave unchecked for an exact match. Enable for patterns, for example
^dev.*or.*-team$. -
Select a Group (the Cockpit group to assign when the claim match succeeds).
Example: assign users from the Marketing department to the Editor group:
- Access for: User matching claim
- Name: CockpitMarketing
- Claim: department
- Claim value: marketing
- Is regex: unchecked
- Group: Editor
Rancher mappings
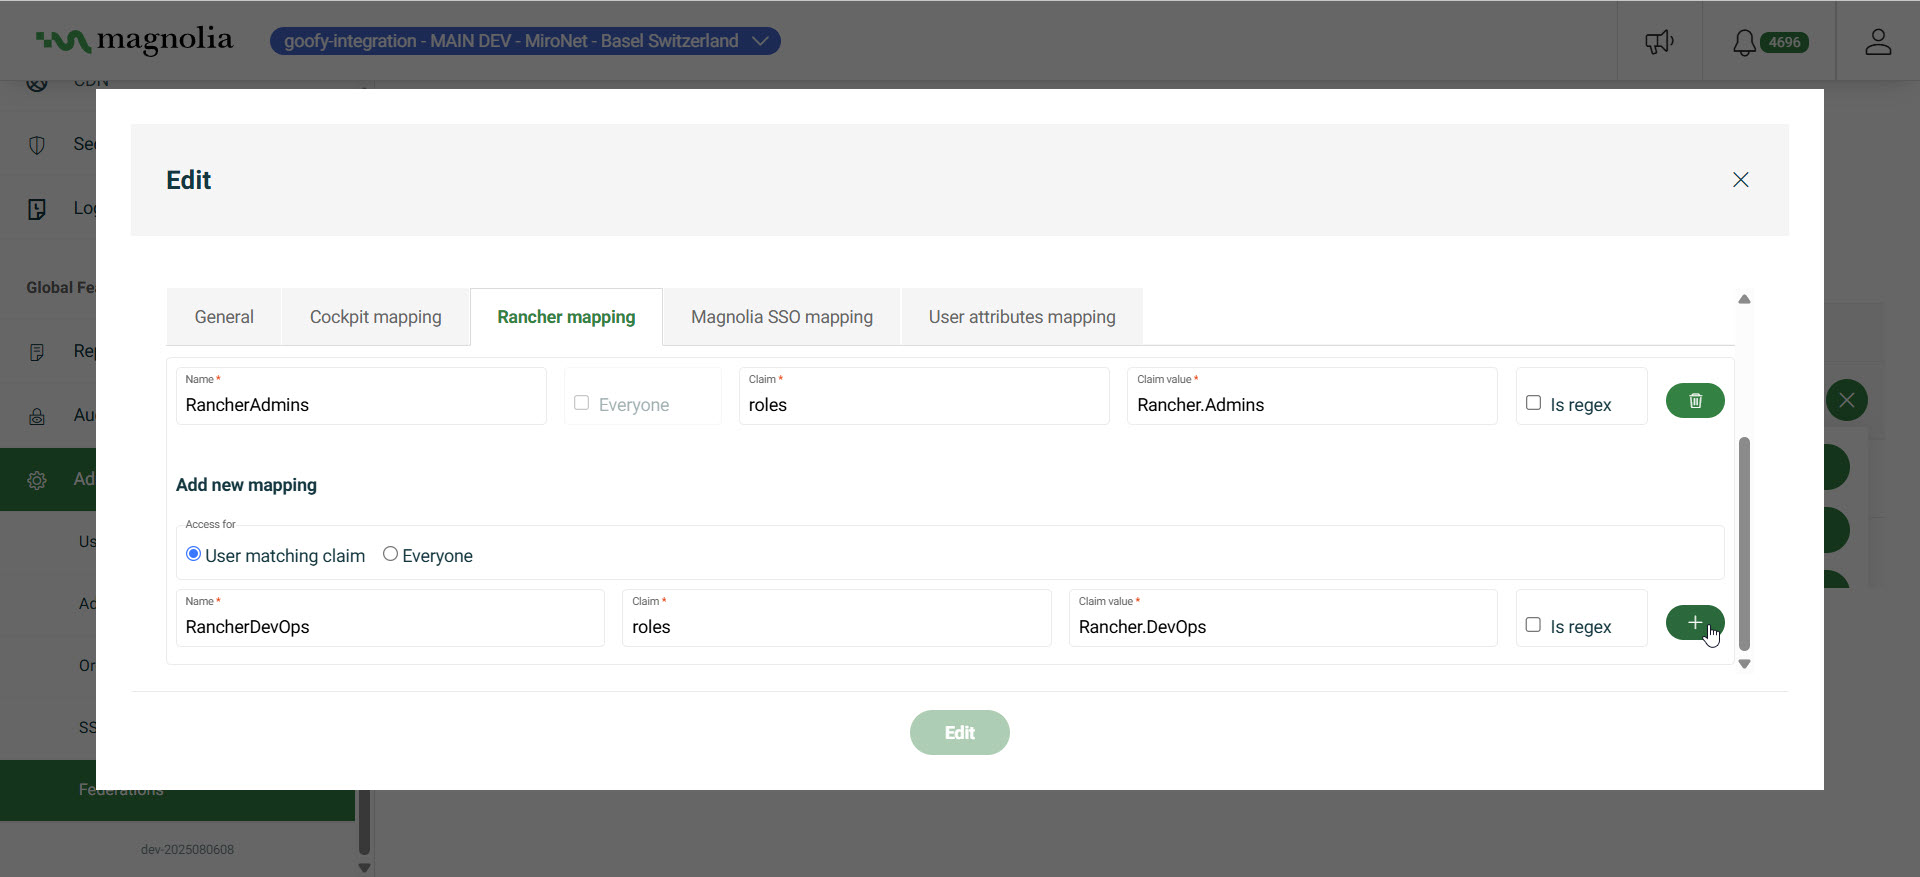
To create a Rancher mapping:
-
Go to the Rancher mapping tab.
-
Click Add new mapping.
-
Under Access for, select User matching claim or Everyone.
-
Enter a Name, Claim, and Claim value.
-
Enable Is regex if the claim value should be treated as a regular expression.
Example: grant Rancher access to users in the DevOps group:
- Access for: User matching claim
- Name: RancherDevOps
- Claim: groups
- Claim value: devops
- Is regex: unchecked
Magnolia SSO mappings
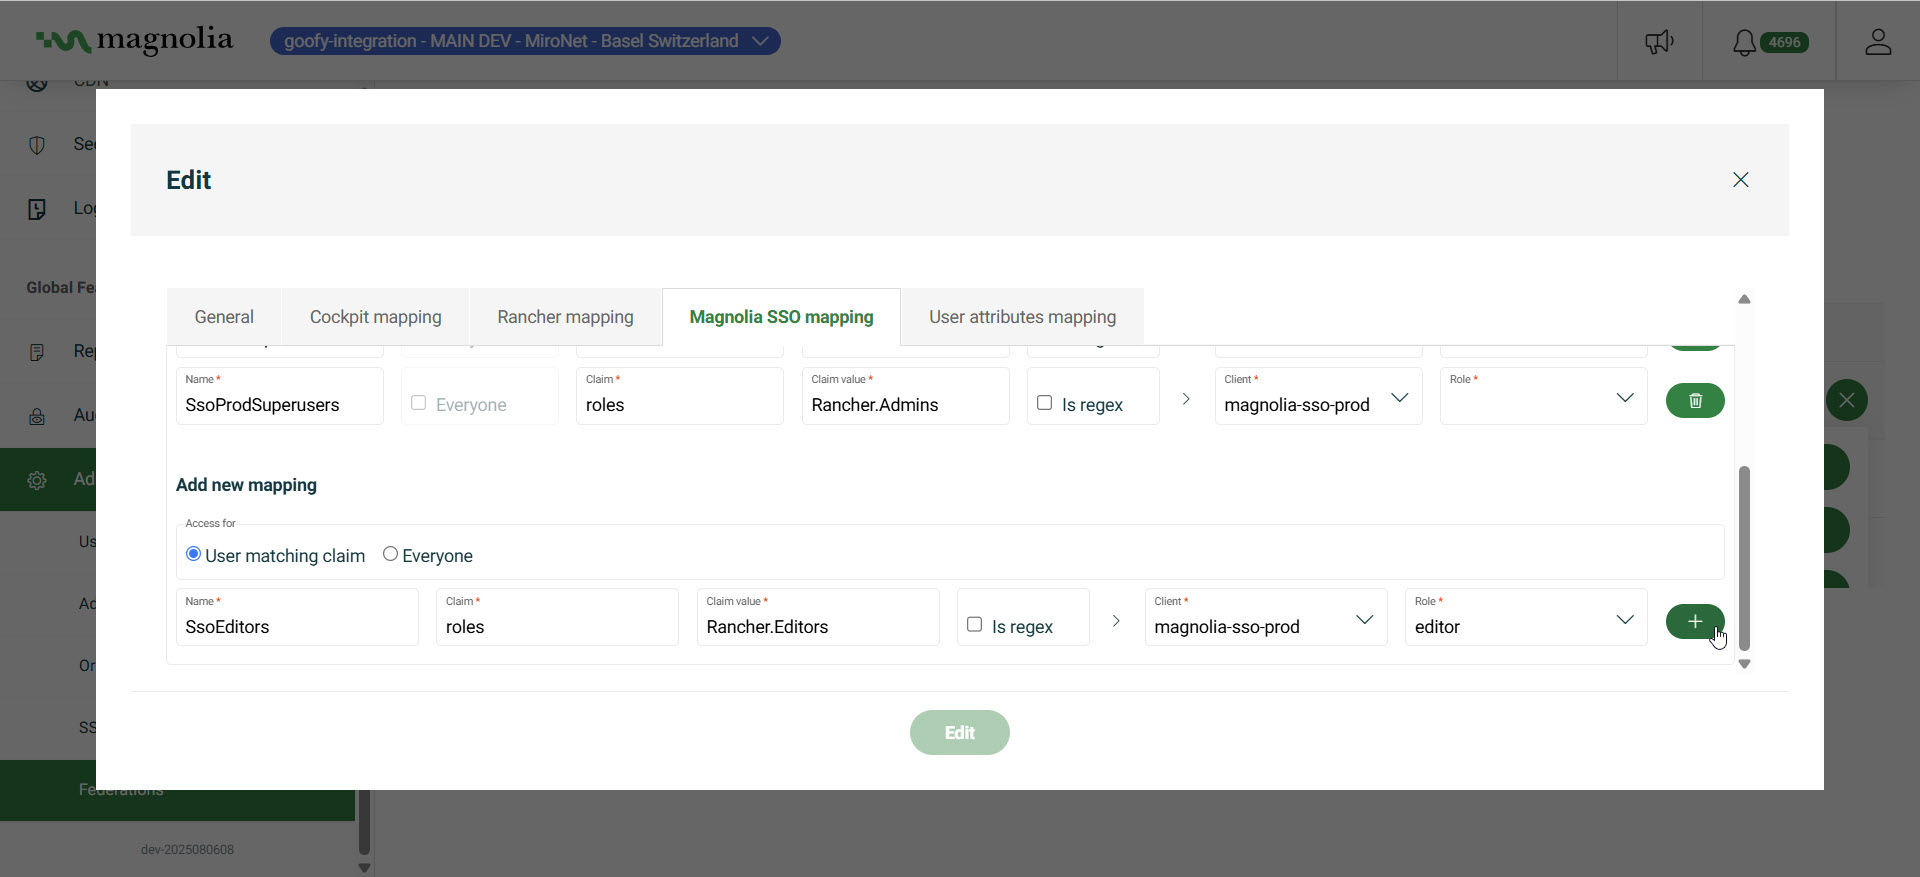
To create a Magnolia SSO mapping:
- Go to the Magnolia SSO mapping tab.
- Click Add new mapping.
- Under Access for, select User matching claim or Everyone.
- Enter a Name, Claim, and Claim value.
- Enable Is regex if needed.
- Select the Client (Magnolia SSO client the user should be assigned to).
- Select the Role within that client.
Example: assign the page-editor role in the admincentral SSO client to users from the marketing group:
- Access for: User matching claim
- Name: MarketingEditorRole
- Claim: groups
- Claim value: marketing
- Is regex: unchecked
- Client: admincentral
- Role: page-editor
User attribute mappings
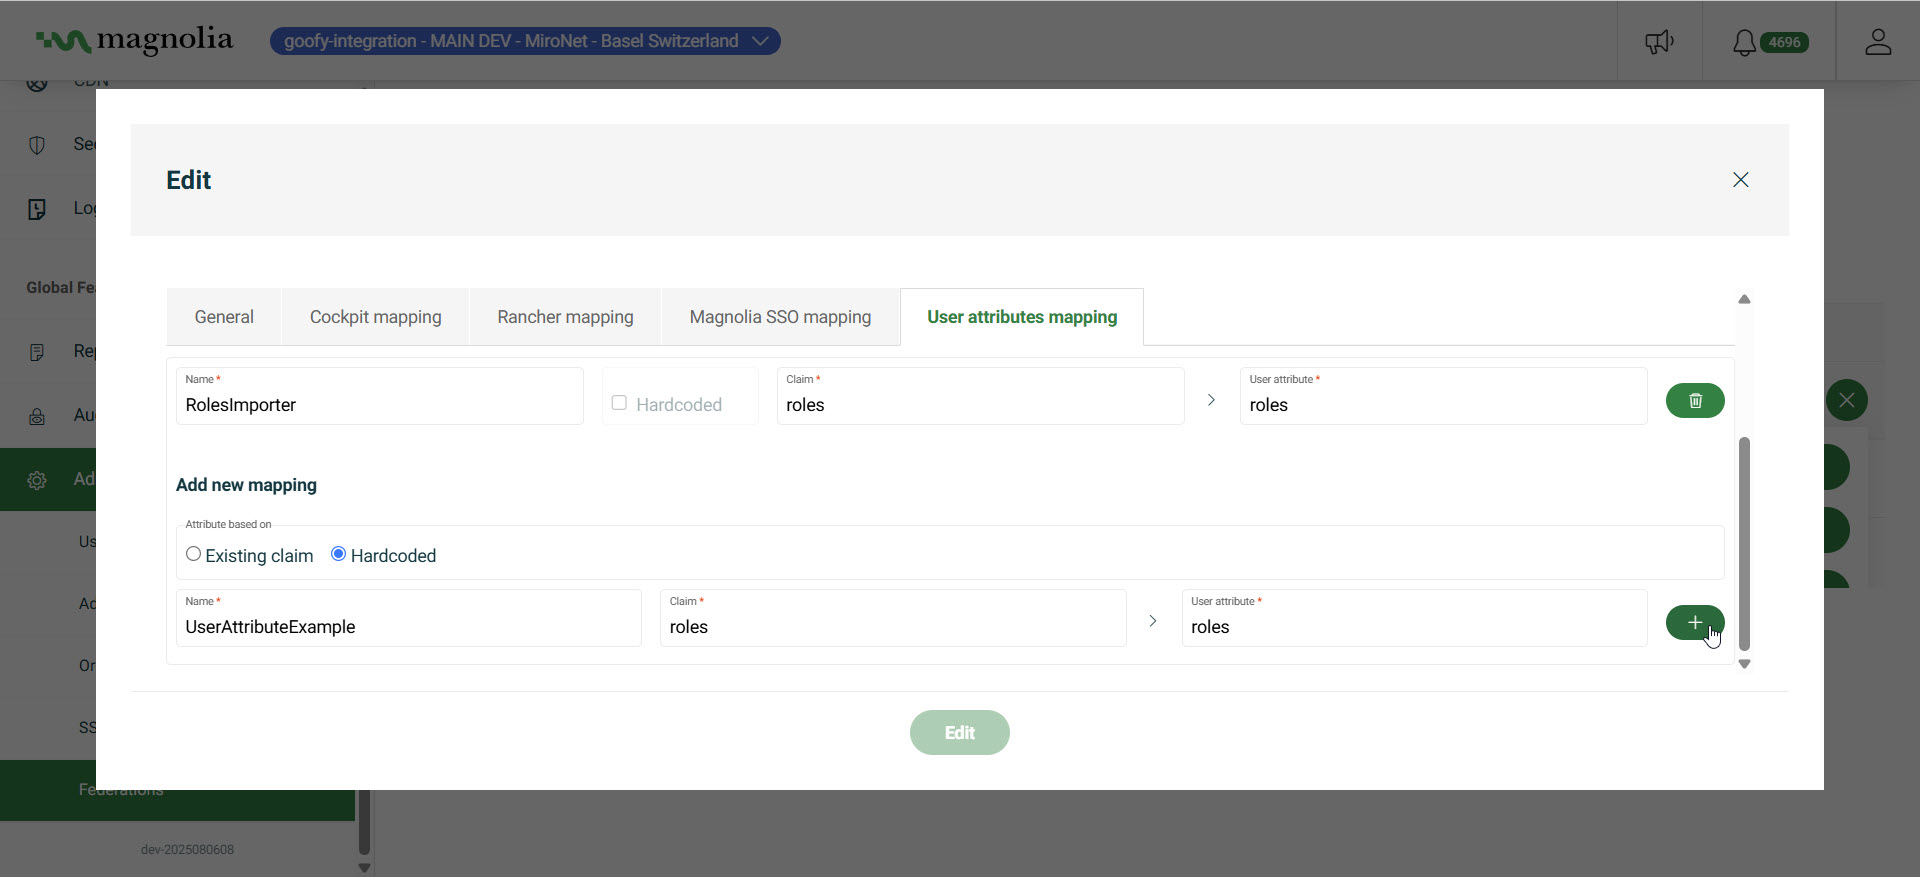
To create a User attribute mapping:
-
Go to the User attribute mapping tab.
-
Click Add new mapping.
-
Choose Attribute based on:
- Existing claim: the value comes from a claim in the IdP token.
- Hardcoded value: the value is fixed and set manually.
-
Enter a Name for the mapping.
-
If using Existing claim, enter the Claim name to extract the value from.
-
Enter the User attribute to populate in Magnolia (for example
email,firstName,lastName,department, orregion).
Example: map the email claim from the IdP to the Magnolia email user attribute:
- Attribute based on: Existing claim
- Name: MapEmail
- Claim: email
- User attribute: email
Delete a Federation
- Go to Admin > Federations.
- Open the row menu and click Delete.
- Confirm the deletion.