

Create redirects
You can view redirects that you have created or add them directly yourself from the Cockpit. You must publish any changes you make to redirects.
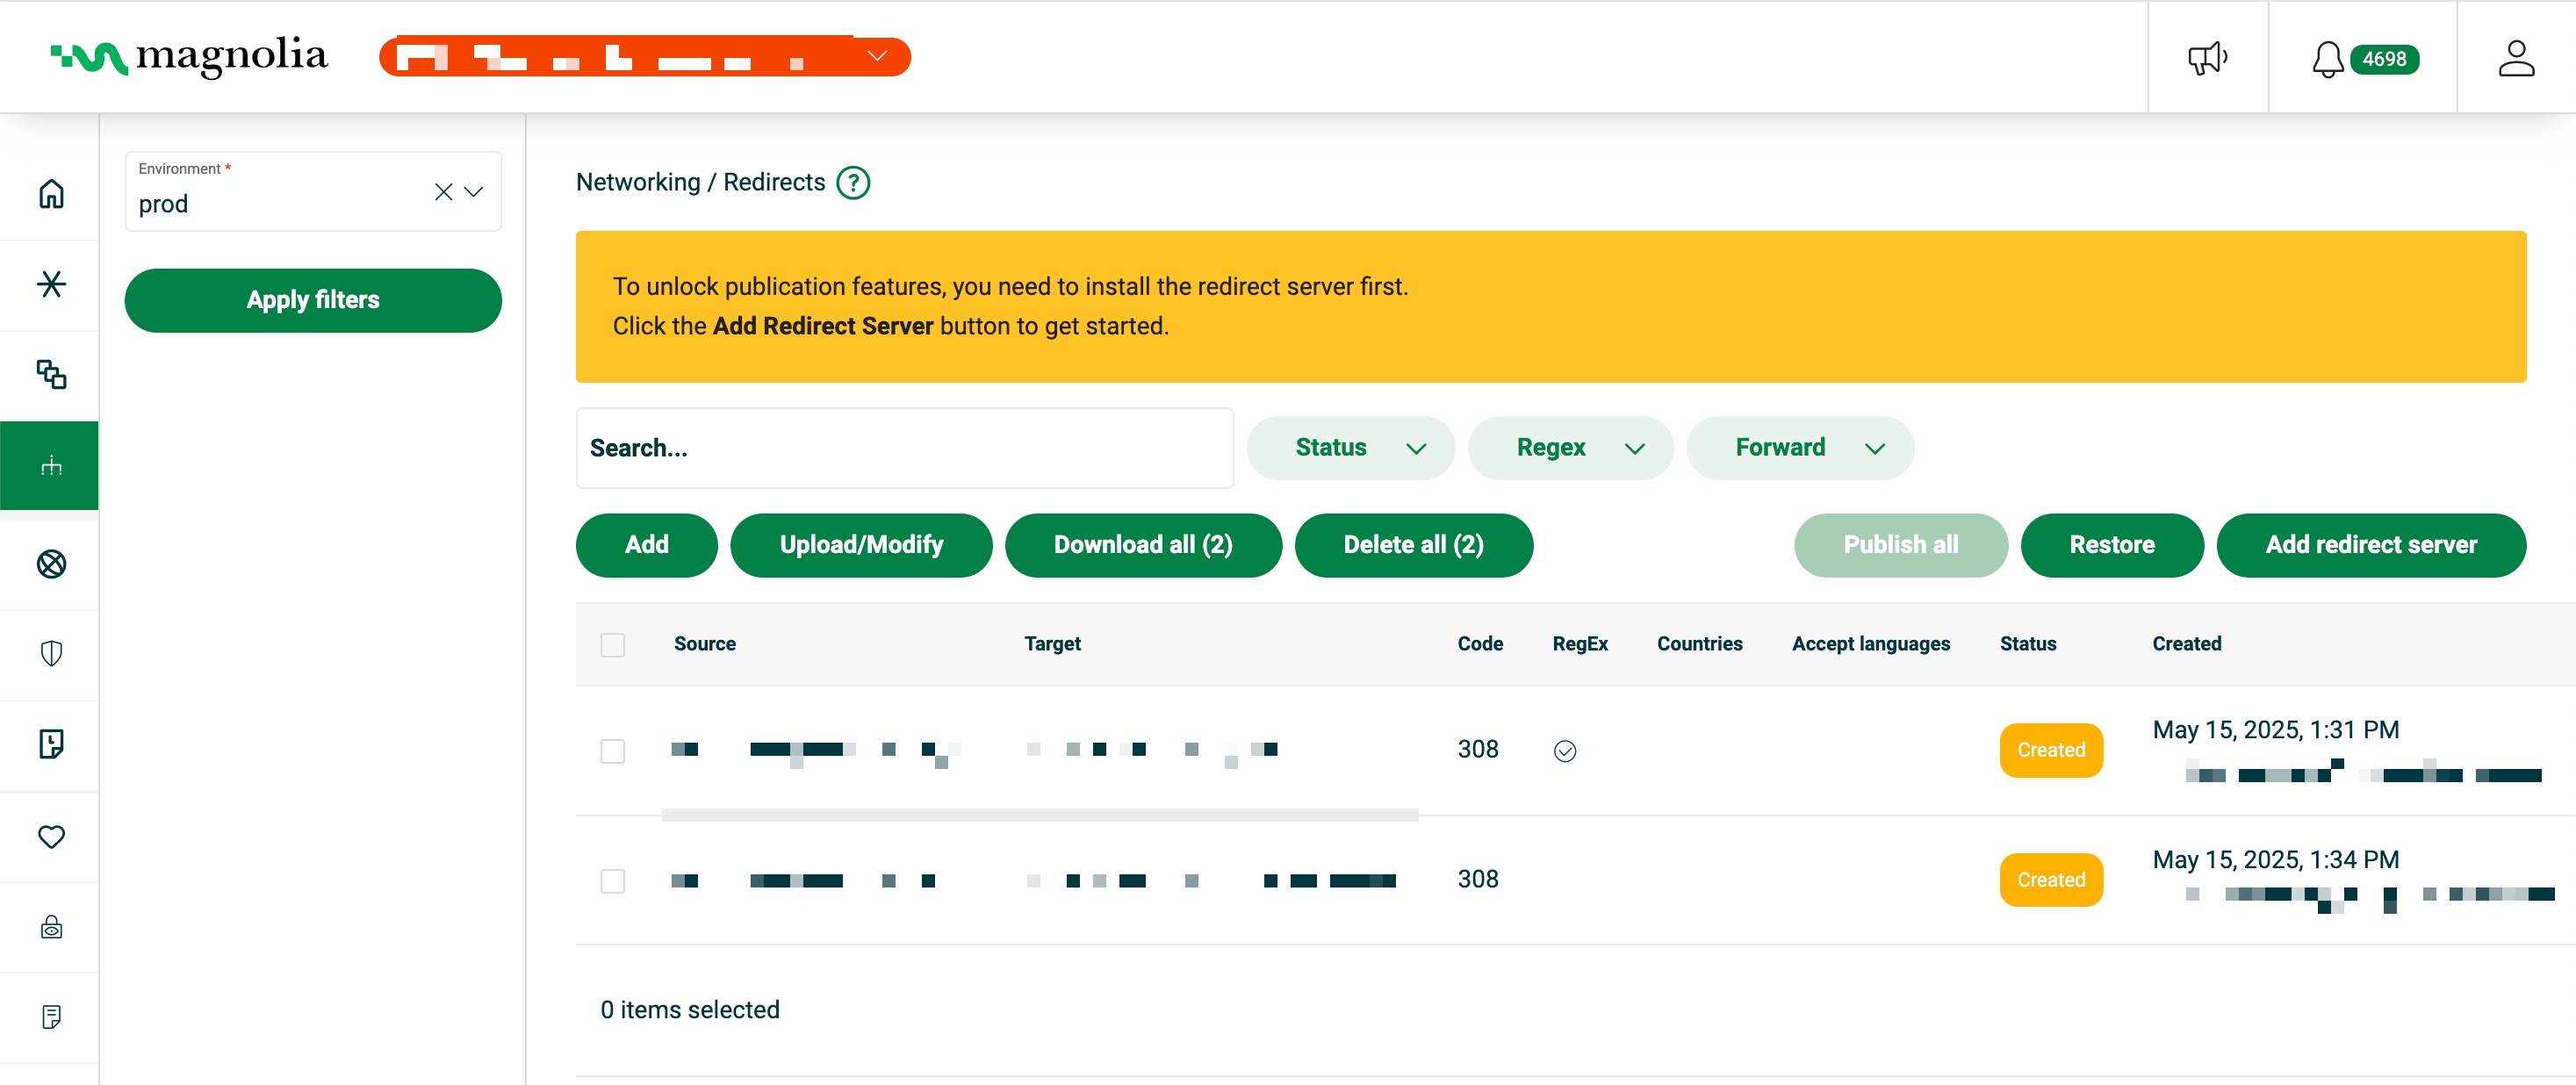
Important concepts:
Actions:
- Add redirect server
- Add redirects
- Manage redirects
- Publish redirects
- Restore redirects
- Download redirects
Good to knows
-
The redirects server is a proxy server.
-
Redirects are evaluated in order of appearance when entered. The first match is accepted.
-
Any query parameters with a request are copied over in the redirect.
-
We use the Source URL to detect duplicate entries when you add a single redirect or batch import redirects (CSV).
If the redirect you enter is a duplicate, you get a
409error code, showing the duplicate already exists. If there are any duplicates in a batch import of redirects, the entire batch is rejected. However, we notify you in the cockpit of the specific duplicate entries so you can remove them from the batch. -
Only
3xxstatus codes are acceptable. Different codes affect the browser in different ways. For more, see HTTP redirections on MDN. -
If there is an issue with your
.csvimport when you import redirects, the dialog will inform you of what the issue is so you can remedy it. -
Some applications (like Microsoft Excel) wrap quotations (
") around CSV lines. You need to remove those quotations if importing or adding a redirect in the Cockpit. -
You can use RE2 syntax.
Regex example
https://www.example.com/[0-9]{2}(bar|baz)matcheshttps://www.example.com/01barorhttps://www.example.com/14bazWildcard example
https://www.example.com/(.*)->https://www.example.com/$1.htmlredirectshttps://www.example.com/testtohttps://www.example.com/test.html
Redirect best practices
To meet security and SEO expectations, canonicalize traffic to the https://www.* host through this chain:
http://example.com -> https://example.com -> https://www.example.comKey Guidelines
- Ordering matters: Redirects are evaluated in order. Place the exact apex-host redirect above any path-preserving rules to avoid unintended behavior.
- TLS coverage:
Ensure your TLS secret covers both
example.comandwww.example.comin the same Ingress to avoid certificate mismatches. - Single Ingress:
Manage apex and
wwwhosts in one Ingress. Delete any separate non-www Ingress resources, and define all hosts under the same TLS secret. - Explicit 308 redirects:
Use permanent
308redirects to preserve HTTP methods. Define two rules:- Exact apex-to-www redirect (avoids added trailing slashes).
- Path-preserving redirect (ensures
/pagemaps to/pageon the canonical host).
- DNS alignment:
Ensure DNS A/AAAA records for both
example.comandwww.example.compoint to your Ingress controller.
Example Ingress
apiVersion: networking.k8s.io/v1
kind: Ingress
metadata:
  annotations:
    cert-manager.io/cluster-issuer: letsencrypt-prod
    nginx.ingress.kubernetes.io/force-ssl-redirect: "true"
    nginx.ingress.kubernetes.io/from-to-www-redirect: "true"
    nginx.ingress.kubernetes.io/proxy-redirect-from: http://
    nginx.ingress.kubernetes.io/proxy-redirect-to: https://
  name: prod-ingress-example-com
  namespace: prod
spec:
  ingressClassName: nginx
  rules:
    - host: www.example.com
      http:
        paths:
          - path: /
            pathType: Prefix
            backend:
              service:
                name: redirects-svc
                port:
                  name: http
    - host: example.com
      http:
        paths:
          - path: /
            pathType: Prefix
            backend:
              service:
                name: redirects-svc
                port:
                  name: http
  tls:
    - hosts:
        - example.com
        - www.example.com
      secretName: prod-ingress-example-com
Example redirect rules (308)
| Source | Target | Code |
|---|---|---|
https://example.com | https://www.example.com | 308 (exact host) |
https://example.com/(.*) | https://www.example.com/$1 | 308 (path-preserving) |
CSV example
https://example.com,https://www.example.com,308 <1>
https://example.com/(.*),https://www.example.com/$1,308 <2>
The first rule avoids an added trailing slash on the target host.
The second rule preserves paths, for example: https://example.com/page -> https://www.example.com/page.
Redirect filters
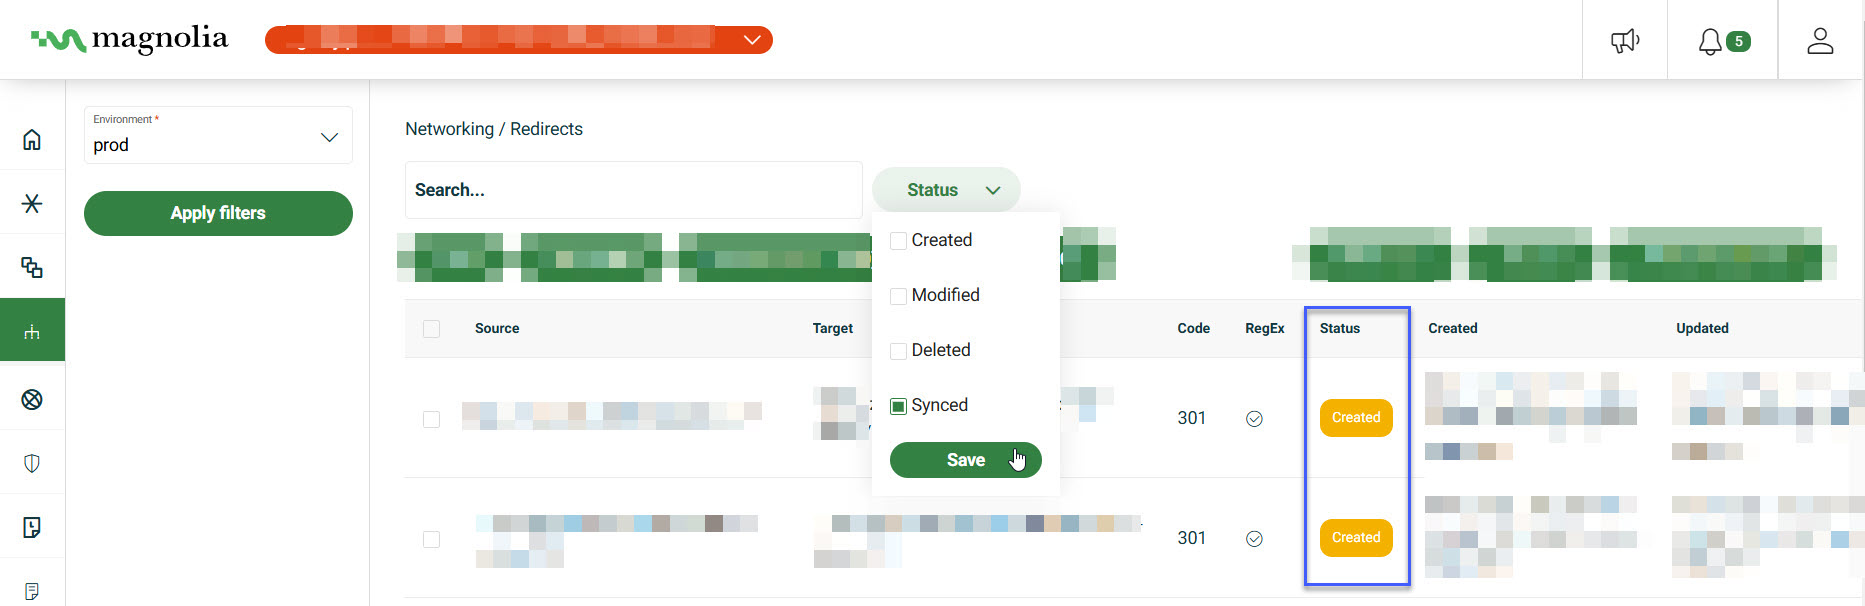
You can see the status of a redirect under the Status column in the redirect table. You can also see whether the redirect uses RegEx or not.
- Synced: Published redirect including any changes (if applicable).
- Created: New redirect; unpublished.
- Modified: Changes were made to the redirect; unpublished.
- Deleted: The redirect is marked for deletion; it is removed the next time you publish.
Status
- In your Cockpit, go to Networking > Redirects.
- Click Status.
- From the dropdown, choose the desired statuses.
- Click Save.
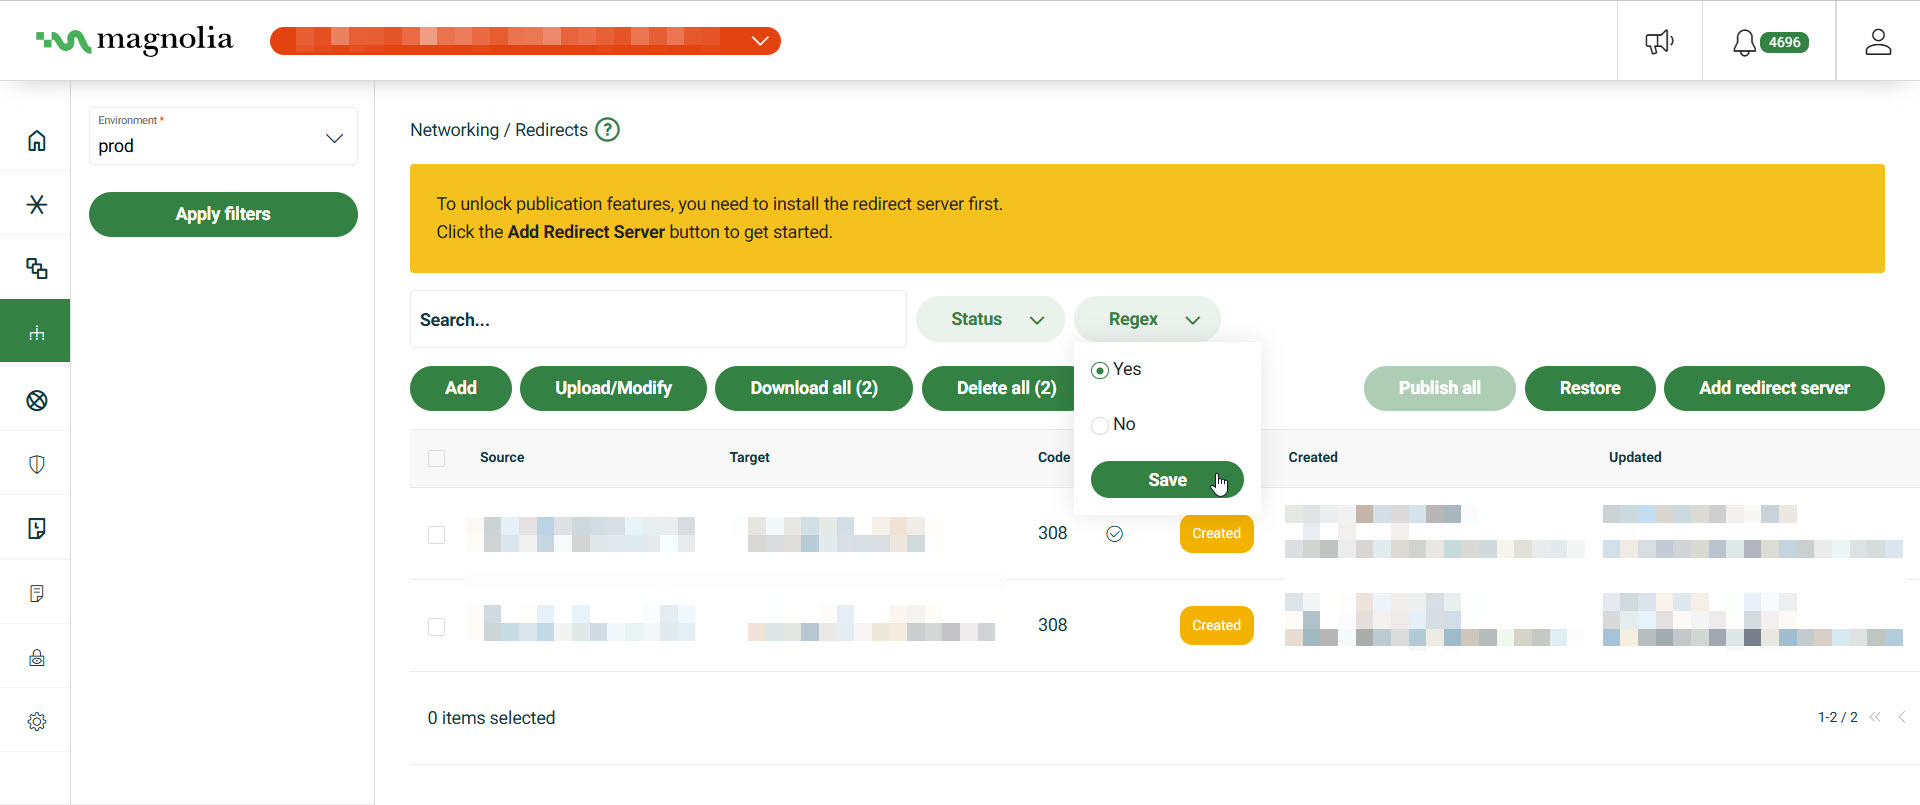
RegEx
- In your Cockpit, go to Networking > Redirects.
- Click RegEx.
- From the dropdown, click yes (uses RegEx) or no (does not use RegEx).
- Click Save.
To remove the filter:
- Click the close icon next to the selected button.
Select desired cluster
Select your desired cluster from the dropdown menu at the top of the Cockpit.

Add redirect server
By default, redirects are served from the backend. However, you can configure the settings to suit your needs if you want to use a Frontend redirect. After adding the redirect server, you can configure and/or uninstall the server as needed. Follow the instructions here to do just that:
-
In your Cockpit, go to Networking > Redirects.
-
Click the Add redirect server button.
-
In the dialog, choose the settings that best suit your needs.
-
Choose the number of Replicas you would like. There is a minimum of 2 redirect server replicas.
You may choose as many replicas as needed. However, if no more memory is available, the system rejects new replicas.
-
Under Redirects server, choose Backend (the default configuration for load balancing with DX Cloud) or Frontend (the frontend client distributes traffic to servers).
If choosing Frontend, you’ll need to pass the port number you want to use, such as
3000. -
Under Load balancing, choose Round Robin (client requests go down the list of servers found in a group; the load balancer forwards a client request to each server in turn and loops back to the top when it reaches the end) or Cookie based (the hashed cookie and other parameters are sent to the client in a cookie; the value in the cookie enables the service to route client requests to the correct server) load balancing.
-
Set your desired Memory limit in MB.
Memory limit details
Memory limit specifies the maximum amount of memory (in megabytes) allocated to each redirect server instance. This setting helps ensure each instance runs efficiently under your traffic load.
When to adjust:
- High traffic or high availability: Add more replicas for load balancing and high availability; increasing replicas spreads traffic across instances rather than relying on more memory per instance.
- Resource optimization: Decrease the limit for low-traffic scenarios to optimize resource usage, especially in resource-constrained environments.
- Frontend vs. Backend: Frontend redirect servers (e.g., using a CDN or JavaScript-based redirects) may require different memory considerations compared to backend servers, as frontend redirects offload some processing to client-side resources.
-
Don’t forget to save your updates.
Configure redirect server
Once you’ve successfully added a redirect server by following the instructions in Add redirect server and saved your updates, the Add redirect server button in the Cockpit changes to Configure redirect server. Clicking this button opens a dialog where you can:
-
Edit the redirect server settings: Modify the existing configuration, such as the number of replicas, redirect server type, load balancing method, or cookie name (if applicable).
You can adjust the following settings through the Configure redirect server dialog.
Consider the following before acting:
- Number of replicas
- Increasing replicas: You can add more replicas to handle increased traffic, but sufficient memory must be available. If memory is insufficient, the system will reject the new replicas, leaving your configuration unchanged.
- Decreasing replicas: Reducing the number of replicas may lower the system’s capacity to manage high traffic loads, potentially degrading performance during peak times.
- Redirect server type
- Switching between backend and frontend redirect servers alters how traffic is routed.
- Switching to frontend: You must specify a valid port (e.g.,
3000). If the port is misconfigured or conflicts with other services, traffic may be misrouted, or the service could become unavailable. - Switching to backend: This reverts to the default configuration, which may not suit your original intent (e.g., if frontend was chosen for performance or security reasons).
- Load balancing method
- Switching to Cookie-Based: You’ll need to provide a cookie name.
If sticky sessions are enabled, this name must not be the same as the value in the
nginx.ingress.kubernetes.io/session-cookie-namein yourvalues.ymlfile. - Switching to Round Robin: This eliminates session persistence, which could disrupt applications that depend on consistent server routing (e.g., those maintaining user sessions).
- Cookie name: Changing the cookie name requires updating the corresponding ingress annotation in your
values.ymlfile if sticky sessions are enabled. Failing to synchronize these values disrupts session persistence. Additionally, altering the cookie name may invalidate existing sessions, potentially logging users out or resetting their session state.
- Switching to Cookie-Based: You’ll need to provide a cookie name.
If sticky sessions are enabled, this name must not be the same as the value in the
- Number of replicas
-
Uninstall the redirect server: Remove the custom redirect server entirely, reverting to the default backend behavior.
Choosing to uninstall the redirect server removes the custom configuration and reverts the system to the default behavior (backend redirect server).
Consider the following before acting:
- Loss of custom benefits: Any advantages gained from the custom redirect server (e.g., optimized traffic distribution, frontend-specific routing) will be lost.
- Service disruptions: Applications or services that depend on the custom redirect server may encounter errors or downtime if the default backend configuration doesn’t suit their needs.
Add redirects
- Go to Networking > Redirects.
- Add a single redirect or upload/modify with a CSV file.
Add redirect
-
Click Add. This opens a dialog where you configure the redirect.
-
Select the Mode to use: Redirect (default) or Forward.
-
Select the HTTP status code to use.
-
Enter the Source URL and Target URL.
Read the information in the help text below to understand how to use the Source URL and Target URL fields.
-
If desired, select any desired Countries and Accept languages that you want to restrict the redirect to.
-
Click Save.
Import redirects (CSV)
- Click Upload/Modify.
- Click Choose File to import a CSV file for redirects.
Format
Id,Source,Target,Code,Query,QueryTarget,Mode,Country,Language <1>Mode is REDIRECT (default) or FORWARD.
Only 3xx HTTP codes are acceptable when Mode is REDIRECT.
Id is optional.
If an Id is provided, the system tries to match it with an existing record and update it.
If blank or no match is found, a new record is created.
Example
Id,Source,Target,Code,Query,QueryTarget,Mode,Country,Language
19514,https://www.example.com,https://www.example.be/foo.html,308,,,REDIRECT,,
,https://www.example.com/[0-9]{2}(bar|baz),https://www.example.be/barbaz.html,,,,FORWARD,"AE,AF,PL",pl- Select your file.
- Click Upload/Modify to complete the action.
Redirect field reference
Mode
The Mode controls how the redirect is handled:
- Redirect (default): sends an HTTP redirect response with the selected status code, and the browser’s URL changes to the Target URL.
- Forward: acts as an internal forward. The target page content is served directly without sending a redirect response to the browser. The browser’s URL remains unchanged, showing the original Source URL while displaying the Target page content.
When Forward is selected, the Target Query and Code fields are disabled.
Code
The HTTP status code sent to browsers and search engines.
Permanent redirects (SEO value transfers to new URL):
- 301: Moved Permanently. Standard permanent redirect for GET requests.
- 308: Permanent Redirect. Like 301, but preserves POST/PUT request methods.
Temporary redirects (original URL retains SEO value):
- 300: Multiple Choices. Indicates multiple redirect options.
- 302: Found. Standard temporary redirect.
- 303: See Other. Redirects POST to GET (e.g., after form submission).
- 307: Temporary Redirect. Like 302, but preserves POST/PUT request methods.
Source
The Source controls when this redirect should apply.
Enter the full Source URL with protocol (for example, https://example.com/old-page) in Source path.
When Clean URLs only is enabled, only requests without query parameters are redirected and any URL that includes ? is ignored by this rule.
- The Source query field lets you further restrict which requests match based on their query string.
Always enter only the part after
?without the leading?(for example,utm_source=google). If you leave Source query empty, any query string will match as long as the Source URL matches.
For background on redirect configuration, see Redirects.
Target
The Target controls where matching requests are sent and how their query string looks after the redirect. The Source query decides which requests match and can capture values, and the Target query then uses those captured values to build the final URL.
Enter the full Target URL with protocol (for example, https://example.com/new-page) in Target path.
- The Target query field defines the query string that will appear on the final redirect URL.
Always enter only the part after
?without the leading?(for example,campaign=flash). If you leave Target query empty, the Target URL is used as is and the query string is not changed by this rule.
For background on redirect configuration, see Redirects.
Country Codes
Restrict this redirect to visitors from specific countries.
Select one or more countries from the dropdown. When set, only visitors from the selected countries will be redirected. Visitors from other countries will not be affected.
Leave empty to apply the redirect globally.
Accept languages
Restrict this redirect based on the visitor’s browser language settings.
Select one or more languages from the dropdown.
The redirect applies only when the visitor’s browser Accept-Language header matches.
The first match is accepted.
Leave empty to apply the redirect regardless of language preference.
Manage redirects
If necessary, you can also edit or delete a redirect.
- Go to Networking > Redirects.
- Select the desired Cluster from the dropdown list.
- Select the desired Environment from the dropdown list.
- Select the redirect you want to manage.
- Click the action menu and select your desired action.
Edit
If editing a redirect:
- Click Edit and in the dialog, edit the field(s) you want to change (Source, Target, Code).
- Click Edit to confirm the changes.
Delete
If deleting a redirect:
- Click the Delete button.
- Confirm that you want to delete the redirect.
Publish redirects
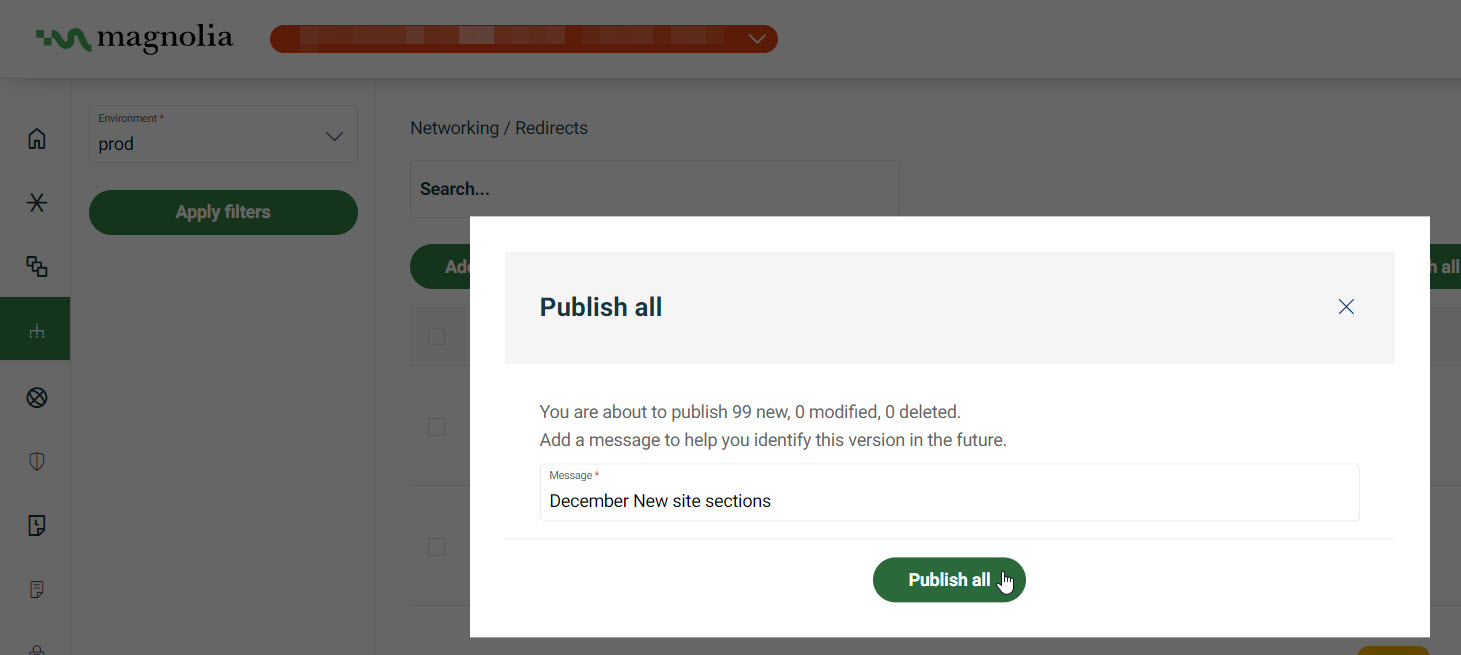
You must publish any changes you’ve made to redirects from within the Cockpit.
- Go to Networking > Redirects.
- Make changes as desired inside the Redirects screen.
- Click Publish all.
- Enter a meaningful message so it’s easier to understand what changes were made. This is useful if you need to restore changes.
- Click Publish all.
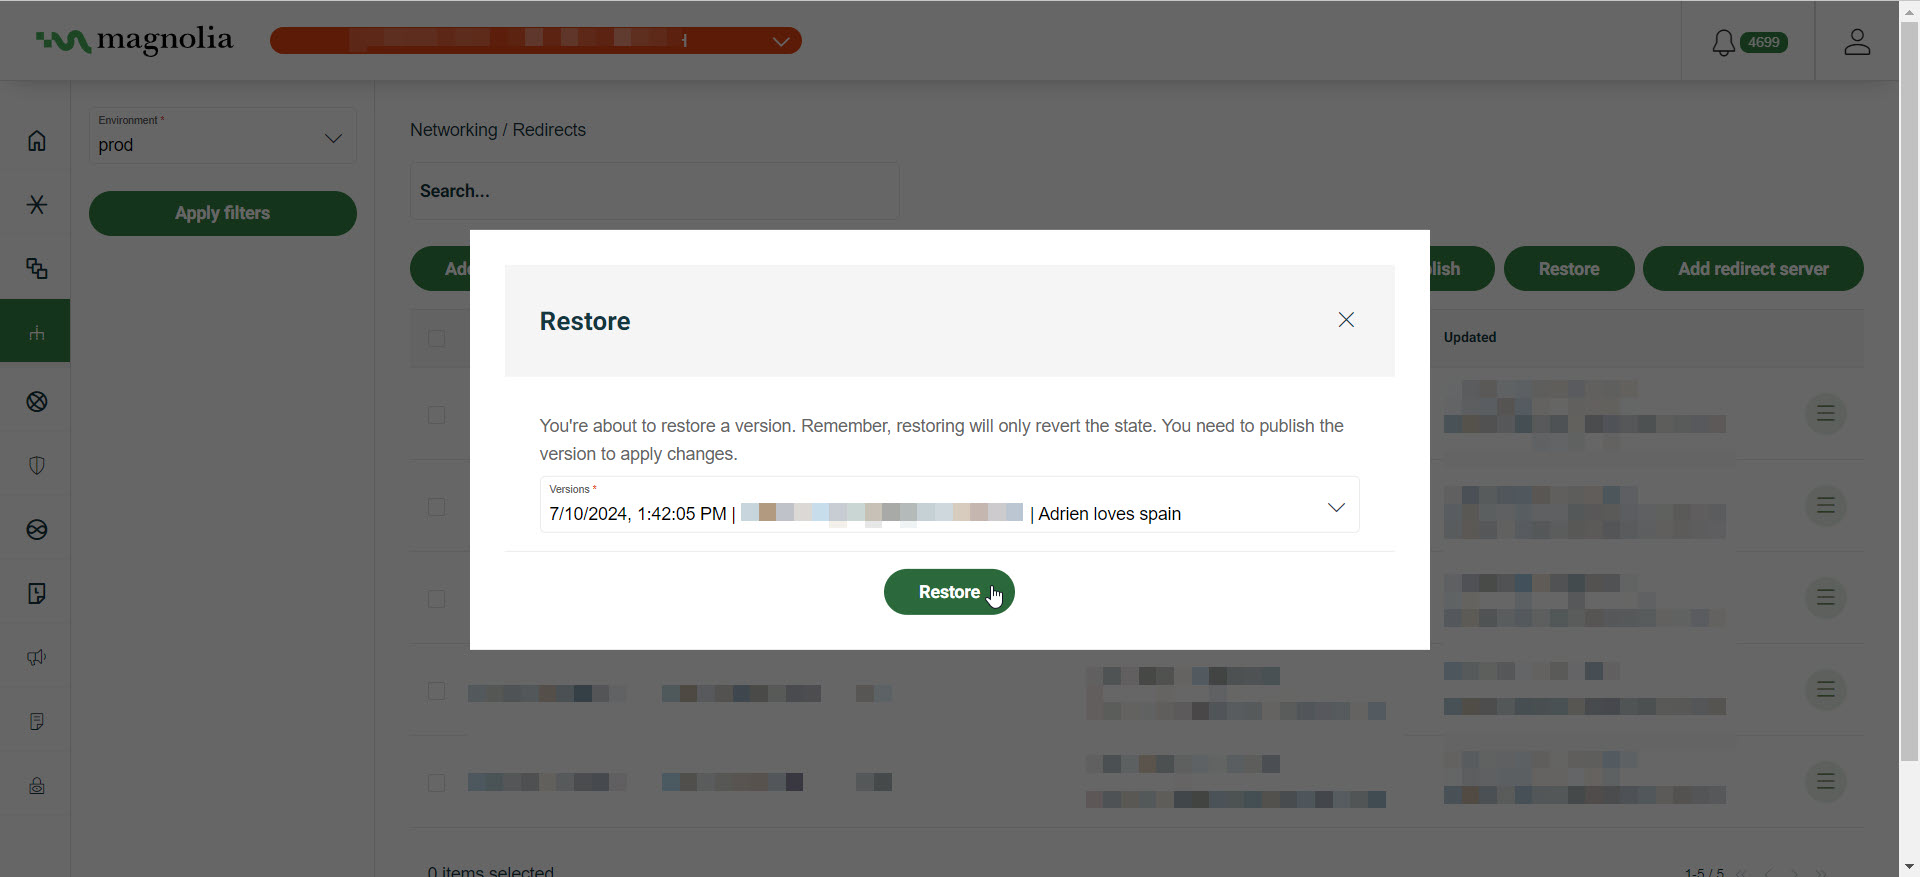
Restore redirects
You can restore redirects that you’ve published.
- Go to Networking > Redirects.
- Click Restore.
- Select a version from the dropdown list.
- Click Restore.
Download redirects
-
Go to Networking > Redirects.
-
Choose one of the listed redirects and click Download selected.
Alternatively, click Download all to download all listed redirects.
-
This generates a
.csvfile download with the following information:idsourcetargetcodeIsRegex